The Complete Guide to Ecommerce Photography
With brands moving to ecommerce, customers can no longer see or examine a product they are keeping in their hands. It has become a major challenge for ecommerce brands to convince customers through the thin screen. Photos are one of the first things customers look at when searching a site. Even for most of them, it is the only thing they look at when deciding whether they will buy the product or not.
Here comes the necessity of good ecommerce photography because photos are one of the first things customers look at when searching a site. Even for most of them, it is the only thing they look at when deciding whether they will buy the product or not.
According to statistics, high-quality product photos had a 94% higher conversion rate than low-quality photos. This guide will walk you through everything you need to know about ecommerce photography, from setting up your shoot to optimising images for your website to ensure your products make the best possible impression online.
What is ecommerce photography?
Ecommerce photography refers to the process of capturing high-quality images of products that are being displayed in online stores to attract potential buyers. These images work as a visual representation of the products as they help potential buyers understand the appearance, features, and details of the items.
Unlike other photography, ecommerce photography focuses on showcasing products in a clear way and mostly features against a plain or white background to eliminate all sorts of distractions.
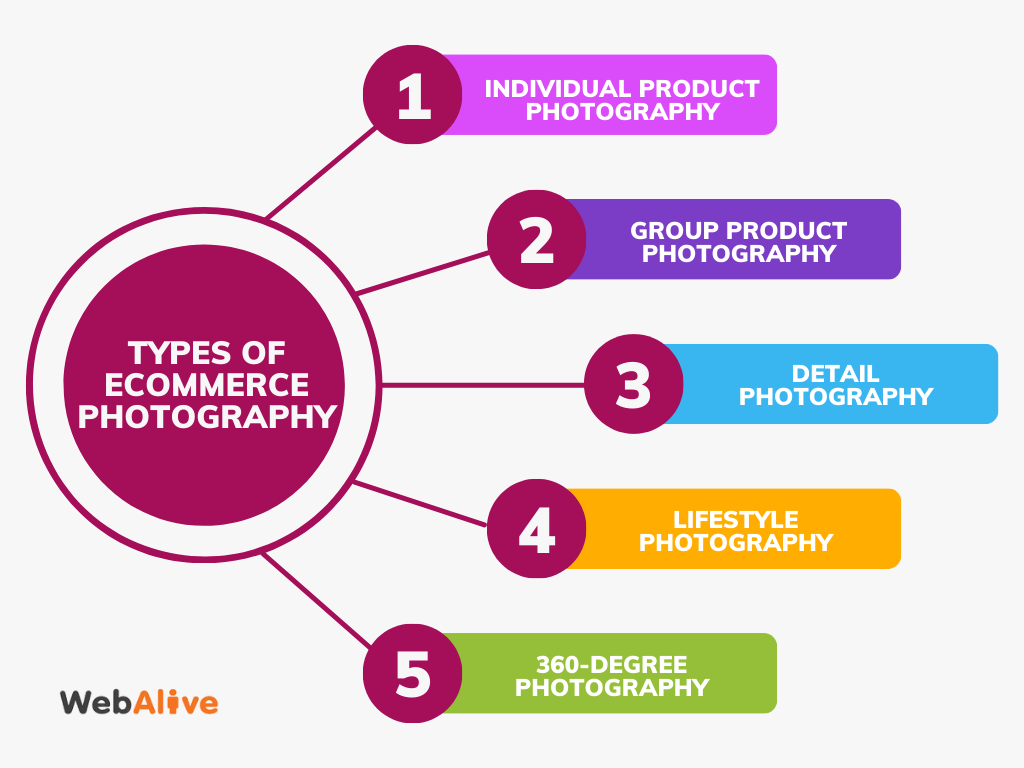
Types of ecommerce photography

Individual product photography
This is one of the most common types of photography that is being used against a plain background, mostly white or neutral. The plain background is used to keep the full focus on the product and to provide a straight forwarded view of the product with no distractions.
Group product photography
Group product photography features many products together and are mostly used for bundles, collections or sets of products. This help to show how the items look together as well as help the customers to understand what’s included in a package.
Detail photography
This sort of shot zooms in on specific aspects of a product, such as the textures, materials or intricate design features. This let customer see the unique quality of a product that might not be visible in standard shots.
Lifestyle photography
This sort of photography shows the product being used in a real-life setting to let customers visualise how the product fits into their daily lives. This sort of photography turns the product seem more reliable and desirable.
360-degree photography
This sort of shot allows the product to be photographed from all angles, creating an interactive experience for the shopper. To get a more comprehensive view of the item, customers can rotate the product image on the screen just as they wish.
6 Must-follow steps to take good product photos
1. You have to prepare your elements first
As ecommerce customers mostly rely heavily on visual information, it is the foundation for capturing high-quality product photos.
Here are some of the must-need elements:
- A high-quality camera
- Lens suitable for close-ups or product photography
- Tripod
- Proper lighting
2. Choose the right background
Choosing the right background is a must in product photography as it can either enhance or detract from the product itself. A neutral background gives the image a professional look. It also creates consistency across multiple product photos, giving the store a cohesive and organised aesthetic.
And choosing between different sort of background eventually depends on your product and the message you want to promote. Even if neutral background is ideal for straightforward presentation, lifestyle background works great to create an emotional connection by telling a story.
3. Get the perfect light
Optimising lighting is crucial in product photography as it affects how the product looks, the level of detail shown and the overall appeal of the image. If you are on a budget, go for natural light, as it is free and easily accessible. It helps to highlight the product evenly without creating harsh shadows or bright spots.
If you are using artificial lights, go for softbox lights or ring lights to boost the product’s texture, colour and shape. Also, soft lighting helps to give the product a polished and professional appearance by removing distracting reflections or hotspots. For close-up shots and detailed photography, you can use reflectors as well.
4. Position the product correctly
Center the product to create a sense of balance and focus. For any ecommerce site, consistency across product photos is crucial as it ensures uniformity when browsing through product listings. Always try to capture multiple angles of a product by taking photos from the front, side, back, and top views.
As online shoppers can’t touch the product physically, it will help them visualise the item. Add objects or props in the frame to provide a clear sense of scale to the customers so they can predict the actual size of the product.
5. Edit and retouch your product photos
It is a crucial step to create polished and professional visuals that attract customers. Focus on the basic adjustments such as exposure, contrast and colours to ensure the product is properly lit and all details are visible.
While editing, make sure to optimise it for web to compress the file size without sacrificing visual quality. Otherwise, large and unoptimised images can slow down your website, leading to a poor user experience.
6. Test before finalising
Before you dive into the full shot, take several test shots to boost various aspects of your setup. Test how the lighting is affecting the positioning of the product, the camera settings, the backdrop and pops. Adjust everything after taking the test shots. You can also review the test images on a larger screen for a more accurate representation of the image’s details.
You can check the blurriness or focus issues as well as check the clarity of the product’s details such as textures, logos or intricate designs. Doing all these will allow you to avoid having to redo the whole process if anything goes wrong.
Final words
It comes with no doubt that high-quality, visually engaging photography can make a huge difference between a quick sale and a lost customer. From choosing the right background to post product editing, every step plays a vital role in showcasing the products. Remember, your product images don’t just tell a story rather represents the professionalism and reliability of your brand as well.
You read a lot. We like that
Want to take your online business to the next level? Get the tips and insights that matter.

